
 |
| Probably the greatest tool in miniature painting history after the brush itself |
Most of you must have heard of wet palettes before and many of you might already be using one or maybe some amongst you have tried and hated that.
If you haven't heard of these or have but never got to try it, here's how I made myself another one.
Now because I find my palette is my best friend, jus press play and see for yourself how life can be made so much easier :
Most of you must have started with a regular palette, using anything at hand. I used a CD case for countless years and never found anything to say about it.
 |
| That's your average Joe Palette with years of paint. |
But after learning about wet palettes and how to cheaply build some (can't remember where), I dived and have to say I never came back to the regular palette.
This is how my wet palette looked like after 2 years of good service :
 |
| Not too sexeeh... |
Of course the baking paper sheet is meant to receive paint and can/must be changed regularly but look at the pic below to see how the sponge turned out :
 |
| Paint stains and signs of rot... time to change it. |
1) A not-tupperware box :

Athough a tupperware box might do just the same, you might want to look for cheap alternatives. You can find those in many shops and for those of you who do get in the kitchen for something else than eat or grab a beer, you can find some in the kitchen drawers and cupboards too ! (and seriously, if you really only get in the kitchen to grab beers and put the feet under the table, take your fingers out, there's plenty of cool stuff to find in there for modelling).
Now I suggest you buy it just to save yourself the trouble to explain (again) to your companion why you picked (again) some kitchen/gardening/kids stuff to use for your "little men"...
I'm not advertising here but if you look under mine, you might spot a clue about where I bought it :

Now this one has a nice shape, round and flat. I know some people like their wet palettes to close if wanted so they can save fresh mixes for days, but I do not fancy that as the painting comfort is reduced and I only mean to keep a given mix for a night at best...

2) Baking paper :

Once again, you can find these in shops and kitchens, you might get away quite easily enough with taking some from the latter if you keep reasonable.
Choose some smooth version, avoid the ones with relief on it (don't ask why, just believe me).
3) Flat sponges :

Choose them the colour you want since it has absolutely no importance (although some may point that it can influence the colour perception you have of your mixes...)
Can be found in... well you know the story : Shops or kitchens.

4) Scissors :

If you don't have those at home, you're probably an alien or you're forbidden to have any for a reason, maybe modelling is not for you (in both cases)...
5) Permanent pen :

This one always finds its use for modelling to trace lines on P-card, mark things under bases, on foam or whatever...
6) A DUCK :
 |
| Because |
From that point, things are fairly simple, just trace the shape of your container on the sponge of your choice (I like blue) with the permanent marker (I mean I really like blue, it's probably my favourite colour).
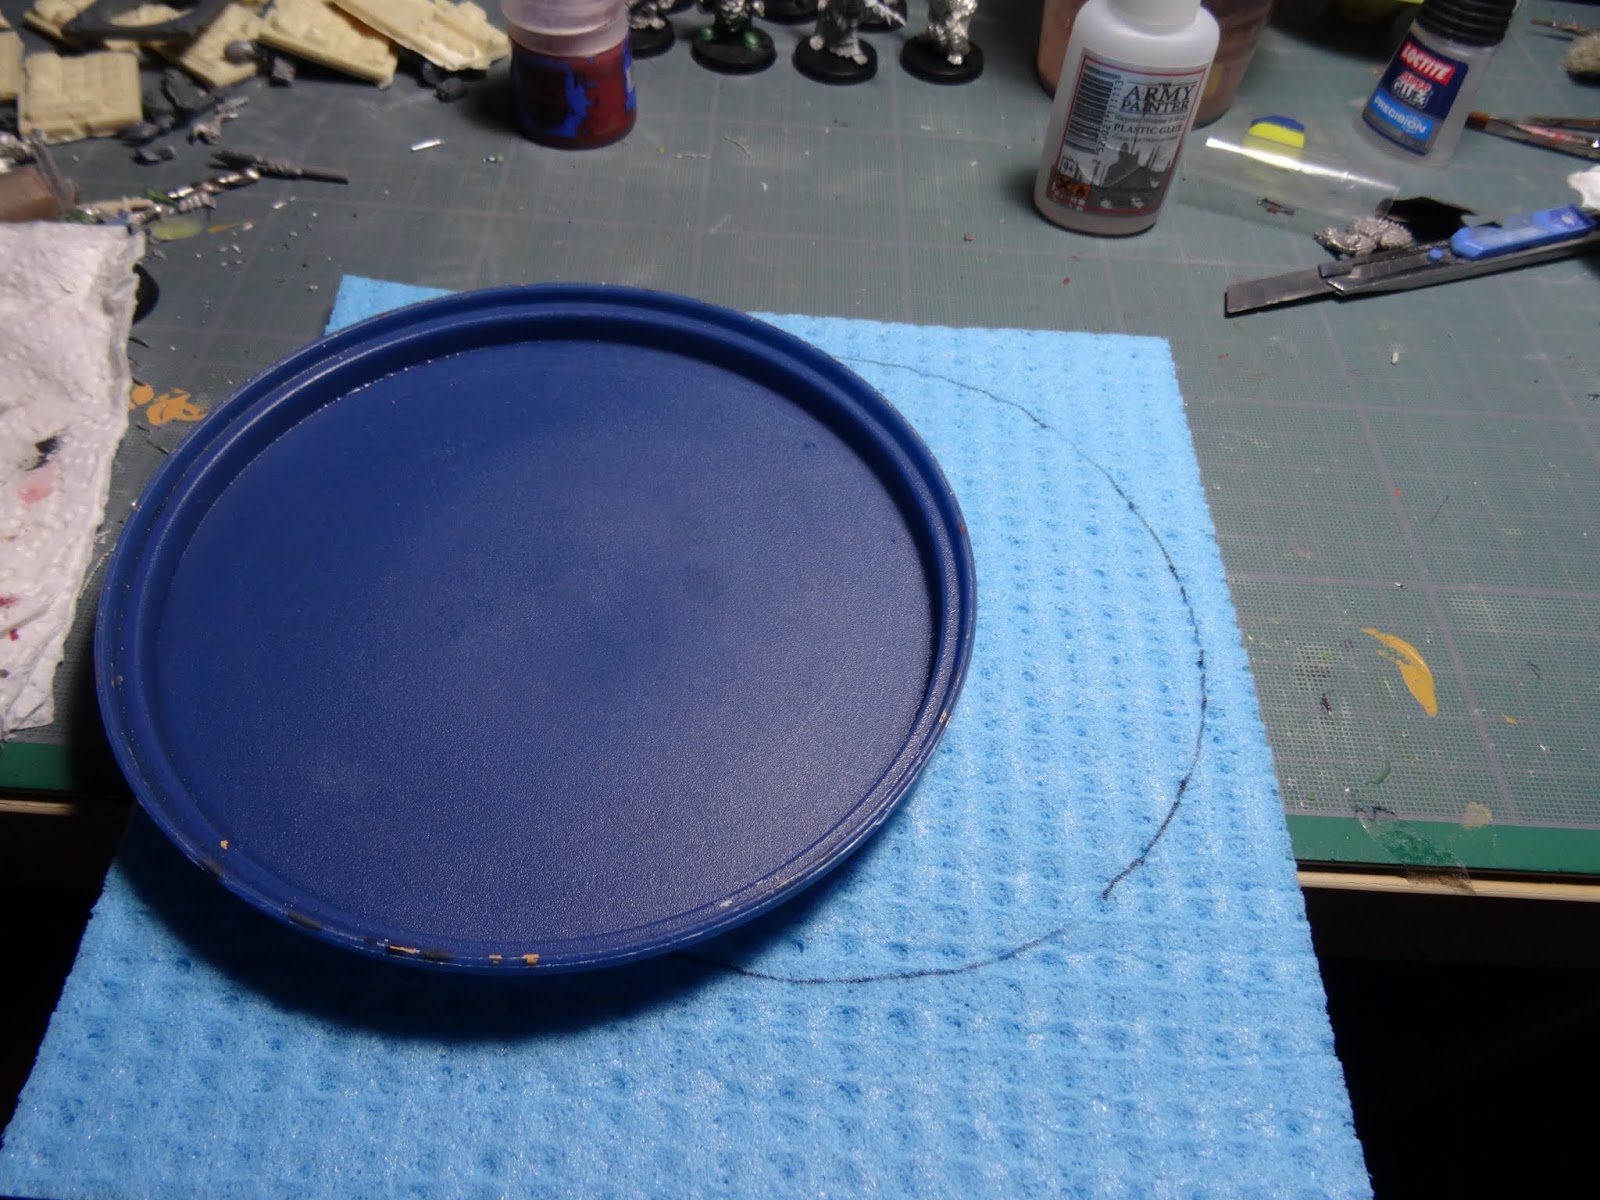
And cut it with the scissors making sure you cut INSIDE the mark left so that the sponge is a little smaller than the container. The sponge will inflate with water so you want to cut it a way it fits when filled.
NOTA : If you use a sponge straight form its package, it will be moist to keep it nice looking and to prevent from any alteration. This means it won't inflate as much as a dry sponge which has been left for some time in the open air, think about it when you cut it to the right size.
This should now look like this :
 |
| Perfect fit, am I not the greatest ? |
 |
| Yeah not as good I know, didn't take the time to trace anything and just cut as I felt... |
You then just have to add some water, now the good quantity is of importance here. You do not want too much water like below :

Still way too much :

It will make the paper drown and make it useless on top of making any of your mix too watery. Just pour the excess of water to reach that point :

Now you're good, just apply one of your baking paper sheets and press it gently so it sticks to the sponge. It is perfect that way, ready to use !

Just apply a drop of each of your colours and begin highlighting with a light heart, knowing your mix will stay fresh for the whole model and that you basically just have to add some of your light colour (cadmium orange here) to the mix to build lighter and lighter highlights !
For beginners or average painters like myself, the palette will also help you keep well thinned down mixes which will help blend colours more nicely (it seems to me the better you become at painting models the more you dilute your paints, I'd even go as far as to say you can measure a painter's worth at the level of dilution of his paint...)

This was just a pause between 2 paintjobs, I know I'm not teaching anything new but I suppose once in a while, sharing even the obvious can help some people out there (I wish I had come upon something like this earlier really).

A simple tutorial for a massively essential piece of painter's kit. I use a plastic chinese takeaway container and buy sponges that fit it exactly because I'm lazy ;)
ReplyDeleteWhatever flaots you rboat I guess, my point here is really it takes minutes to get a really helpful tool, chinese take away containers seem to be even better since you basically don't pay them !
DeleteAwesome, I made the same discovery a few months from now and I must agree : once you try it, you'll never want to go back !
ReplyDeleteFor sure, I know a lot of pros who don't use it but as far as I'm concerned, I know it helps a lot and the time/energy/money spent are really worth it.
DeleteThanks !
I think Delaney over on Kings Minis gave a tip about stopping the rot in the wet palette tray. Just add a bit of Winded aka Ammonia to the water.....keeps the bacteria in check.
ReplyDeleteGreat tutorial, but now I've got to go find a damn duck to attain the next level of painting prowess :(
Oh now you mention it Ithink I remember something of the sort !
DeleteYou can skip the duck if needed, it's just far less fun.
Thanks !
Thanks for showing, I've tried a wet palette a few times but I never got on well with it (Plus with 2 cats it turns into a wet fluff magnet hehe).
ReplyDeleteWell, some people don't really fancy it, I believe it all relates with how you paint really. I used to have my cat playing on the hobby range at a time and it drove me mental each time. Now, my hobby desk is somewhere safe from kids and cats (still not from wife though) !
DeleteI've never tried this before, but now I've got a trusted example to follow I'm going to give it a try. (sneaking around the wife as always).
ReplyDeleteHonestly, you may just as well find it is no bog deal or that it is the tool you've always needed. I know it has altered teh way I paint in a way I like so for that cost, it's worth a try I guess.
DeleteThat's very interesting, I might give it a go. I remember once trying to paint while on holiday in Greece - it was completely hopeless because the paint dried on the palette too fast to use it. This might have saved the day.
ReplyDeleteI know those kind of days and indeed it does help a lot ! the palette will probably not stay wet for long if you do not opt for a closable version but as far as painting goes it will surely help. During summer (it often reaches above 35°C where I live) I generally only have to refill the palette every 2 days to keep it good.
DeleteThat's a cracking tutorial mate, cheers! I've never tried a wet palette, I've made half arsed attempts to make one, but I always ended up back on the takeaway lid. I'll be giving this a try though, might save me some time if I don't keep having to redo my mixes
ReplyDeleteHonestly, when working on huge models or groups, it is very comfortable to have the mix fresh for an extended period of time. There's also less paint waste sine you can reuse raw paint during a whole session.
DeleteThanks !
Ever put extender in your water? Just thinking about keeping it wet longer. Just made one off the back of reading this. Will see how it plays. Got a nifty snap/clip sandwich box. Will be able to put the main box over the lid I'll be using and snap it shut for max freshness. Will post to my blog re success or otherwise. Great post.
ReplyDeleteI've heard about it (Think it was on Kings miniatures). If you're bow is flat enough I suppose you've got the recipe for success ! I know I need a very flat one for painting comfort but it all comes down to a personal feeling. Please post you conclusions, I might upgrade mine !
DeleteI used to use a wet pallet all the time when I painted large canvases with acrylic. I made it out of a plate and kitchen roll. I shouldn't be lazy and should make one of these for mini painting too, that or find my old plate.
ReplyDeleteMaking a new one might take less time than finding the old one ;) I find this tool equally good for careful blendings on one model as it is for large batches where keeping a mix fresh is appreciated.
DeleteGreat guide! You made me understand how simple it is to create one so I have as of today joined the wet-palette-club :)
ReplyDeleteThanks! /Hans
Great ! I'm pretty sure a tool like That Can be useful with your painting technique with glazes.
Deletethanks a lot